Regularly check SORACOM usage charges and send notifications by email.
Overview
This app template creates an app that regularly sends SORACOM usage fees by email. This app helps with:
Example Email Report
The email report will contain content like:
Your SORACOM usage fee for this month is currently 12 USD.
Once this template is set up, you will receive regular reports without any manual operation.
Estimated Costs
Initial Costs
There are no initial costs associated with using this app template.
Monthly Costs
Item | Estimated Cost for This App | Notes |
|---|---|---|
SORACOM Flux | Up to 3.41 yen/month (*1) |
This is an estimate and may vary based on actual usage. For accurate pricing, please check the Pricing & Fee Schedule and usage details in the User Console.
Preparation
Before deploying this template, please prepare the following:
For more details, refer to SORACOM’s documentation on Email Addresses.
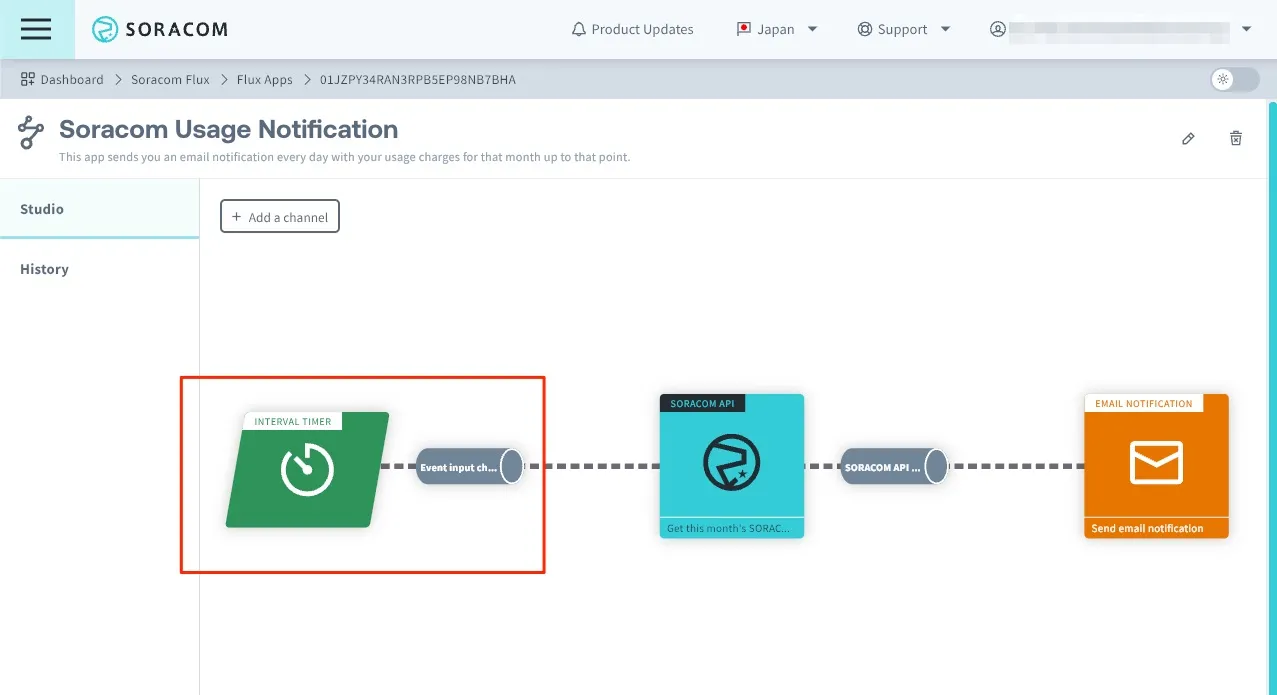
Creating the App
When creating the app, you can customize the destination email address and email sending interval.
Post-Creation Tasks
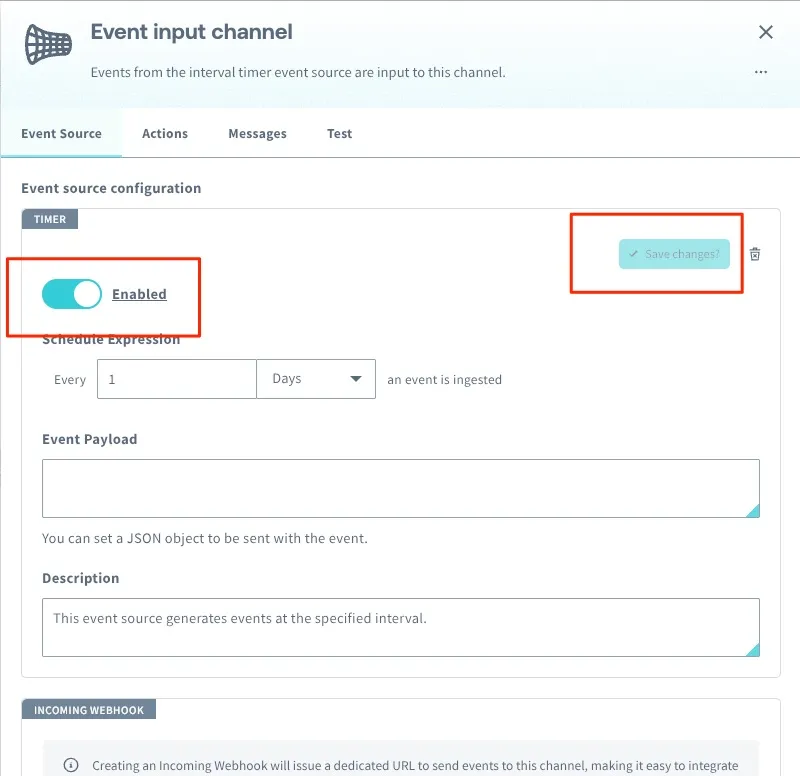
The interval timer is OFF immediately after creating the app. Manually test the app execution, and once you confirm the email notification, turn the timer ON.
-
Click Interval Timer.
-
Set Interval Timer to ON and save.
Customization
You can change the email destination and message template from the email notification action settings screen. You can also customize the email sending interval.
Customizing the Email Notification Action
You can change the email message template from the email notification action settings screen.
-
Click on the [EMAIL Notification] action from Flux Studio.
TODO: Attach an image of email selection below images/app-create-0.png
-
Update the email destination and content from [CONFIG].
Customizing the Email Sending Interval
-
Click on the [Interval Timer] action from Flux Studio.
TODO: Attach an image of the interval timer images/app-create-0.png
-
Update the event occurrence interval from “Schedule Definition” in [TIMER].
Troubleshooting
If the app doesn’t work properly, check the app execution history. For details, refer to Checking Execution History/Message History (Logs).